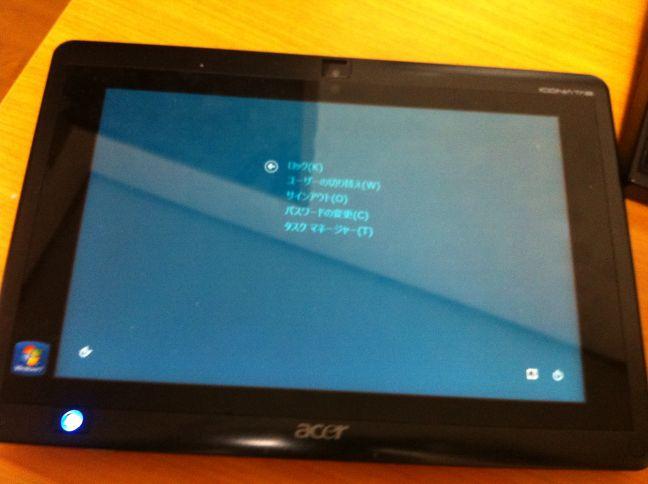
acer w500 に win8 を試していて、何が困るかと言えばキーボードが無いことです。いや、USB があるのだから差し込めばいいのですが(iPadの場合は、Bluetoothキーボードか、ソフトウェアキーボードで我慢)、画面キャプチャが出来ないのが不便。キーボードを繋げば、Print Screen キーでキャプチャできるのはわかっているし、リモートデスクトップを使えばキャプチャができるのはわかっているのですが、画面そのままの状態が欲しい。iPad の場合は、電源+ホームボタンでOKなのですが、win8 の場合はどうなんでしょう?
試しに、winキー + 電源ボタンを押すと、ctrl+alt+del と同じ画面がでます。
■Mouse without Borders を使う
Mouse without Borders – k本的に無料ソフト・フリーソフト
http://www.gigafree.net/internet/remote/mousewithoutborders.html
つい先日知ったのですが、「Mouse without Borders」でリモートコンピュータの画面キャプチャができます。『タスクトレイ上のアイコンを右クリック → 「Get Screen Capture from」 から、他PC の
デスクトップ画像をキャプチャしたり、「Send Screen Capture to」 から、自PC のデスクトップ画像を
他のパソコンに送ることもできたりします』ってな具合で、うーむ、簡単にできますね。
実は、これを twitter で知った時に、画面キャプチャ用のツールを作っていたんですよね orz 実にタイムリー(?)というか、なんというか。
■自作してみる
マウス制御で print screen キーを押せばよいのですが、まぁ画面キャプチャだけの単体ツールを作ってみましょうということで。
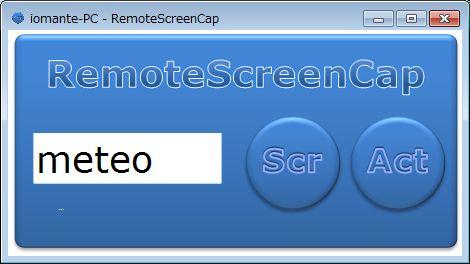
こんな画面で、リモートコンピュータの全体の画面キャプチャとアクティブウィンドウの画面をキャプチャします。リモート先でも同じプログラムを動かしておいて、キャプチャする画面からホスト名を入れて「Scr」か「Act」ボタンを押すだけです。最初は win フォームのチープな画面だったのですが、Mouse without Borders に対抗して、Excel で画像を作ってみました。
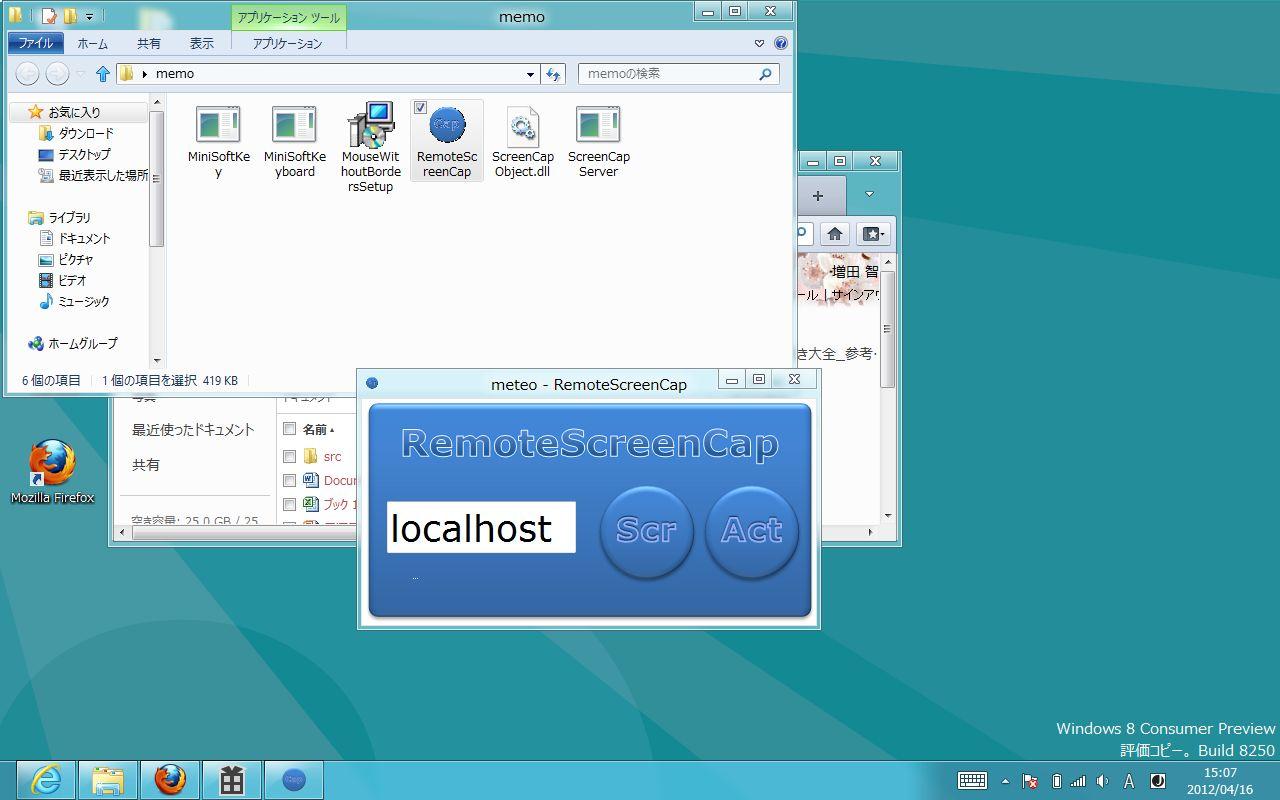
こんな風に、キャプチャ先のコンピュータで同じプログラムを動かしておけばOKです。
■.NETリモートを使う
データのやり取りには、.NETリモートを使っています。tcp/ip で直接扱う方法もあるし、iis を使う方法もあるのですが、.NETリモートが一番手軽です。
.NET リモートでは同じクラスを共有して受け渡しをするので、まず MarshalByRefObject を継承するクラスを作ります。CapCom と CapComRemote という2つのクラスを作っているのは、同じプログラムでクライアント/サーバーを共有させているためです。別々のプログラムにする場合は、ひとつのクラスで十分です。
1 2 3 4 5 6 7 8 9 10 11 12 13 14 15 16 17 18 19 20 21 22 23 24 25 26 27 28 29 30 31 32 33 34 35 36 37 38 39 40 41 42 43 44 45 46 47 48 49 50 51 52 53 54 55 56 | namespace RemoteScreenCap{ public class CapCom : MarshalByRefObject { /// <summary> /// 汎用コマンド送信 /// </summary> /// <param name="cmd"></param> /// <returns></returns> public string GoSendCmd( string cmd ) { if (SendCmd != null) { return SendCmd(cmd); } return ""; } /// <summary> /// ホスト名を通知 /// </summary> /// <param name="hostname"></param> public void GoSendHostname(string hostname) { if (SendHostname != null) { SendHostname(hostname); } } /// <summary> /// スクリーンキャプチャ実行 /// </summary> /// <param name="cmd"></param> /// <returns></returns> public byte[] GoScreenCap(string cmd) { if (ScreenCap != null) { return ScreenCap(cmd); } return null; } public delegate string SendCmdHandler(string cmd); public event SendCmdHandler SendCmd; public delegate byte[] ScreenCapHandler(string cmd); public event ScreenCapHandler ScreenCap; public event Action<string> SendHostname; } /// <summary> /// リモート側の通信クラス /// </summary> public class CapComRemote : CapCom { }} |
キャプチャしたデータは byte[] 配列で受信します。Bitmap クラスは Marshaling されないので、一度 BMP 形式のデータに直すわけですね。
イベントは戻り値を持つことができるので、delegate と event を使って定義します。これが、戻り値を必要としない場合は、Action< > を使うとひとつの定義で済みます。こっちのほうが最近の流行りです。
■画面のキャプチャと送信
ひとまず、全文を晒しておきます。もう少し整理したら Git に上げておきます。
1 2 3 4 5 6 7 8 9 10 11 12 13 14 15 16 17 18 19 20 21 22 23 24 25 26 27 28 29 30 31 32 33 34 35 36 37 38 39 40 41 42 43 44 45 46 47 48 49 50 51 52 53 54 55 56 57 58 59 60 61 62 63 64 65 66 67 68 69 70 71 72 73 74 75 76 77 78 79 80 81 82 83 84 85 86 87 88 89 90 91 92 93 94 95 96 97 98 99 100 101 102 103 104 105 106 107 108 109 110 111 112 113 114 115 116 117 118 119 120 121 122 123 124 125 126 127 128 129 130 131 132 133 134 135 136 137 138 139 140 141 142 143 144 145 146 147 148 149 150 151 152 153 154 155 156 157 158 159 160 161 162 163 164 165 166 167 168 169 170 171 172 173 174 175 176 177 178 179 180 181 182 183 184 185 186 187 188 189 190 191 192 193 194 195 196 197 198 199 200 201 202 203 204 205 206 207 208 209 210 211 212 213 214 215 216 217 218 219 220 221 222 223 224 225 226 227 228 229 230 231 232 233 234 235 236 237 238 239 240 241 242 243 244 245 246 247 248 249 250 251 252 253 254 255 256 257 258 259 260 261 262 263 264 265 266 267 | namespace RemoteScreenCap{ public partial class Form1 : Form { public Form1() { InitializeComponent(); } // 自ホスト名 private string HostName = ""; // リモート側のホスト名 private string RemoteName = ""; // 要求マシンのホスト名(未使用) private string ClientName = ""; // 待ちポート番号 private int PORT = 19000; private void Form1_Load(object sender, EventArgs e) { // ホスト名を表示 this.HostName = System.Net.Dns.GetHostName(); this.Text = string.Format("{0} - {1}", HostName, "RemoteScreenCap"); // コネクション待ち(リモート側の処理) // HTTPチャンネルを設定する HttpChannel ch = new HttpChannel(PORT); ChannelServices.RegisterChannel(ch, false); var chObj = new CapComRemote(); RemotingServices.Marshal(chObj, "chObj"); // ハンドルを登録する chObj.SendCmd += new CapCom.SendCmdHandler(chObj_SendCmd); chObj.SendHostname += new Action<string>(chObj_SendHostname); chObj.ScreenCap += new CapCom.ScreenCapHandler(chObj_ScreenCap); // 受付を開始する ch.StartListening(null); } #region クライアント側の処理 private bool remoteConnected = false; /// <summary> /// リモートコンピュータに接続 /// </summary> /// <param name="sender"></param> /// <param name="e"></param> private void buttonConnect_Click(object sender, EventArgs e) { remoteConnected = RemoteConnect(); } private bool RemoteConnect() { this.RemoteName = textRemote.Text; // 送信用のチャンネルを設定する RemotingConfiguration.RegisterWellKnownClientType( typeof(CapCom), string.Format("http://{0}:{1}/chObj", this.RemoteName, this.PORT)); return true; } /// <summary> /// コマンドを送信 /// </summary> /// <param name="sender"></param> /// <param name="e"></param> private void button1_Click(object sender, EventArgs e) { if (remoteConnected == false) { // 接続 if ((remoteConnected = RemoteConnect()) == false) { MessageBox.Show("リモートコンピュータ {0} に接続できません", this.RemoteName); return; } } // コマンドを送信する var obj = new CapCom(); string res = obj.GoSendCmd(textCommand.Text); MessageBox.Show(res); } /// <summary> /// 画面キャプチャ /// </summary> /// <param name="sender"></param> /// <param name="e"></param> private void button2_Click(object sender, EventArgs e) { if (remoteConnected == false) { // 接続 if ((remoteConnected = RemoteConnect()) == false) { MessageBox.Show("リモートコンピュータ {0} に接続できません", this.RemoteName); return; } } // 画面キャプチャコマンドを送信 var obj = new CapCom(); byte[] data = obj.GoScreenCap("all"); if (data == null) { MessageBox.Show("エラー発生", "", MessageBoxButtons.OK, MessageBoxIcon.Error); return; } MemoryStream mem = new MemoryStream(data); Bitmap bmp = new Bitmap(mem); // mem.Close(); /* this.BackgroundImage = null; this.BackgroundImage = bmp; this.Width = bmp.Width; this.Height = bmp.Height; */ Clipboard.SetImage(bmp); } #endregion #region リモート側の処理 /// <summary> /// クライアントコンピュータ名を保存 /// </summary> /// <param name="name"></param> void chObj_SendHostname(string name) { this.ClientName = name; } byte[] chObj_ScreenCap(string cmd) { Bitmap bmp = null; if (cmd == "active") { // アクティブウィンドウをキャプチャ bmp = ActiveWindowCapture(); } else { // 画面全体をキャプチャ //Bitmapの作成 bmp = new Bitmap(Screen.PrimaryScreen.Bounds.Width, Screen.PrimaryScreen.Bounds.Height); //Graphicsの作成 Graphics g = Graphics.FromImage(bmp); //画面全体をコピーする g.CopyFromScreen(new Point(0, 0), new Point(0, 0), bmp.Size); //解放 g.Dispose(); } MemoryStream mem = new MemoryStream(); bmp.Save(mem, System.Drawing.Imaging.ImageFormat.Bmp); mem.Close(); byte[] data = mem.ToArray(); return data; } [StructLayout(LayoutKind.Sequential)] private struct RECT { public int left; public int top; public int right; public int bottom; } [DllImport("user32.dll")] private static extern IntPtr GetWindowDC(IntPtr hwnd); [DllImport("user32.dll")] private static extern IntPtr GetForegroundWindow(); [DllImport("user32.dll")] private static extern int GetWindowRect(IntPtr hwnd, ref RECT lpRect); [DllImport("user32.dll")] private static extern IntPtr GetDC(IntPtr hwnd); [DllImport("gdi32.dll")] private static extern int BitBlt(IntPtr hDestDC, int x, int y, int nWidth, int nHeight, IntPtr hSrcDC, int xSrc, int ySrc, int dwRop); [DllImport("user32.dll")] private static extern IntPtr ReleaseDC(IntPtr hwnd, IntPtr hdc); private const int SRCCOPY = 13369376; /// <summary> /// アクティブウィンドウをキャプチャ /// </summary> /// <returns></returns> private Bitmap ActiveWindowCapture() { IntPtr hWnd = GetForegroundWindow(); IntPtr hDC = GetWindowDC(hWnd); //ウィンドウの大きさを取得 RECT rect = new RECT(); GetWindowRect(hWnd, ref rect); Bitmap bmp = new Bitmap(rect.right - rect.left, rect.bottom - rect.top); Graphics g = Graphics.FromImage(bmp); IntPtr gDC = g.GetHdc(); BitBlt(gDC, 0, 0, bmp.Width, bmp.Height, hDC, 0, 0, SRCCOPY); g.ReleaseHdc(gDC); g.Dispose(); ReleaseDC(hWnd, hDC); return bmp; } /// <summary> /// コマンド受信 /// </summary> /// <param name="cmd"></param> /// <returns></returns> string chObj_SendCmd(string cmd) { return this.HostName + ":" + DateTime.Now.ToString() + ":" + cmd; } #endregion private void remoteCapture(string cmd) { if (remoteConnected == false) { // 接続 if ((remoteConnected = RemoteConnect()) == false) { MessageBox.Show("リモートコンピュータ {0} に接続できません", this.RemoteName); return; } } // 画面キャプチャコマンドを送信 var obj = new CapCom(); byte[] data = obj.GoScreenCap(cmd); if (data == null) { MessageBox.Show("エラー発生", "", MessageBoxButtons.OK, MessageBoxIcon.Error); return; } MemoryStream mem = new MemoryStream(data); Bitmap bmp = new Bitmap(mem); Clipboard.SetImage(bmp); label2.Text = DateTime.Now.ToString() + " completed."; } private void label1_Click(object sender, EventArgs e) { // 全画面のキャプチャ remoteCapture("all"); } private void label3_Click(object sender, EventArgs e) { // アクティブな画面のキャプチャ remoteCapture("active"); } }} |
■受信側のコード
ちょっとだけ解説をすると、以下の部分がリモートコンピュータ側のコネクション待ちです。HttpChannel クラスでチャンネルを作って登録するあたりは定番なコードになります。RemotingServices.Marshal メソッドで登録するクラスが内部変数になっていますが、本来は外側に出すべきかなと。まぁ、参照している間は消えないのでこれでOKです。
…が、.NETリモートの場合、この通信用のオブジェクトが不定期に解放されるのを防ぐために、lifttimeを無限大にしておくことをお奨めします。この話は別な機会に。
1 2 3 4 5 6 7 8 9 10 11 12 13 14 15 16 17 18 19 | private void Form1_Load(object sender, EventArgs e){ // ホスト名を表示 this.HostName = System.Net.Dns.GetHostName(); this.Text = string.Format("{0} - {1}", HostName, "RemoteScreenCap"); // コネクション待ち(リモート側の処理) // HTTPチャンネルを設定する HttpChannel ch = new HttpChannel(PORT); ChannelServices.RegisterChannel(ch, false); var chObj = new CapComRemote(); RemotingServices.Marshal(chObj, "chObj"); // ハンドルを登録する chObj.SendCmd += new CapCom.SendCmdHandler(chObj_SendCmd); chObj.SendHostname += new Action<string>(chObj_SendHostname); chObj.ScreenCap += new CapCom.ScreenCapHandler(chObj_ScreenCap); // 受付を開始する ch.StartListening(null);} |
■送信側のコード
.NETリモートのクライアント側からは、http プロトコルを使います。受信側で定義したアドレスに対してリクエストを投げるわけですね。
受信した byte 配列から bitmap クラスを再作成するには、MemoryStream クラスを使います。まあ、詳細はコードを見て頂くということで。
1 2 3 4 5 6 7 8 9 10 11 12 13 14 15 16 17 18 19 20 21 22 23 24 25 26 27 28 29 30 31 32 33 34 35 36 37 38 39 40 41 42 43 44 45 46 47 48 | private bool RemoteConnect(){ this.RemoteName = textRemote.Text; // 送信用のチャンネルを設定する RemotingConfiguration.RegisterWellKnownClientType( typeof(CapCom), string.Format("http://{0}:{1}/chObj", this.RemoteName, this.PORT)); return true;}/// <summary>/// 画面キャプチャ/// </summary>/// <param name="sender"></param>/// <param name="e"></param>private void button2_Click(object sender, EventArgs e){ if (remoteConnected == false) { // 接続 if ((remoteConnected = RemoteConnect()) == false) { MessageBox.Show("リモートコンピュータ {0} に接続できません", this.RemoteName); return; } } // 画面キャプチャコマンドを送信 var obj = new CapCom(); byte[] data = obj.GoScreenCap("all"); if (data == null) { MessageBox.Show("エラー発生", "", MessageBoxButtons.OK, MessageBoxIcon.Error); return; } MemoryStream mem = new MemoryStream(data); Bitmap bmp = new Bitmap(mem); // mem.Close(); /* this.BackgroundImage = null; this.BackgroundImage = bmp; this.Width = bmp.Width; this.Height = bmp.Height; */ Clipboard.SetImage(bmp);} |
metro アプリケーションの場合もキャプチャができるので、こんな風に画面をスライドしている途中の画面もキャプチャができます。
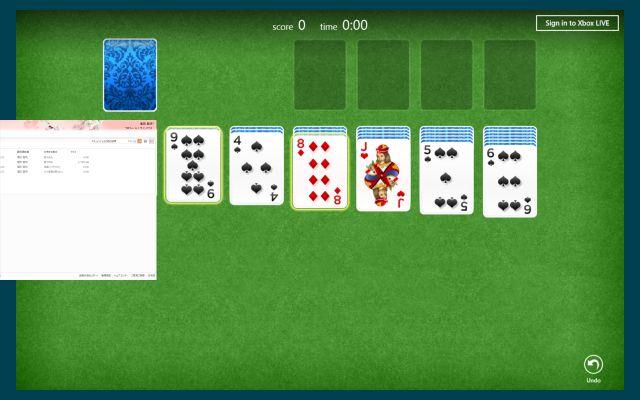
あと、キーボードを押さなくていいので、普通のデスクトップのメニューが出ているところとかも撮りやすいはずです。
ひとまず、実行ファイルのダウンロードはこちらから。
http://moonmile.net/up/RemoteScreenCap-0.1.zip